Home » BLOG » cost

Tag: cost

Shopping for new jewelry??

IMG_3382

That’s right. Some shiny new jewelry for Betsy and Gunner!!

Okay, well they’re really just ID tags but Betsy SURE was excited to have a new pretty jewel for her pretty collar :)

I’m not sure if Gunner ever had a tag with his name on it. (Bad mommy!!) He had licensing tags and he used to have a tag for his chip number, but those have all been lost long ago. He actually doesn’t even have a collar anymore. He was getting all clean and handsome while his daddy was brushing him on the dock a few weeks ago and they decided to take his collar off to get a good brushing on his neck. When he was all done Peter put the choke back on him to get him back on the boat. We use a prong collar for attaching his leash since he still has a problem with lunging out at anything that moves. It doesn’t hurt him, but helps us have a small amount of control if he decides to yank the leash out of our hands. Some time between then and later that evening we noticed his waterproof collar was nowhere to be found. No doubt, it ended up in the water and settled down in the murky sand beneath our boat never to be seen again.

Back home we could have gone into the local pet store and printed up a super quick and easy ID tag for the pups, but now that we live on a boat everything is a bit more complicated.  Every purchase we make, everything we bring on the boat has to be thought out in advance to make sure it meets certain criteria:

  1. Material: How long will it survive in the salt, the hot Caribbean sun, and the humidity
  2. Function: How many purposes will it serve? Its ideal if everything we own has at least 3 purposes (this saves on cost and space)
  3. Size: How big is it? Do we have a place to securely stow it while under way?
  4. Cost: Can we get it cheaper somewhere else without too much hassle? Are there discounts in bulk?

We knew we had to have ALL STAINLESS STEEL for our pet ID tags, and not just a crappy kind, but we had to make sure it was marine grade stainless steel to hold up to the salt water that we’ll be (literally) swimming in daily.

Function here is obvious. If our adventurous pups get separated from us for whatever crazy reason, we want them to have some sort of ID on them to increase the chances of being returned to us. This is a MUST HAVE before we leave the dock.

Size? Well, no brainer, they are teeny tiny and stay on the dogs at all times.

Cost? This one is kind of tricky. We could have gone for a cheapo kind for less than $3 a piece. Marine grade stainless steel is going to cost a bit more of course.

A common problem for companies that make pet ID tags is that most of them don’t let you use that many characters per line. This was a challenge for us because our boat name is 15 characters without spaces or ‘/’ marks. Betsy has her chip tag and she also used to wear a very pretty heart ID tag but we decided we needed some critical information on their new tag that Betsy’s old one didn’t have. We wanted to make sure to put our boat name on the tags so that if they were to get away from us while cruising, whoever found them would know they belong to S/V (sailing vessel) Mary Christine. We also wanted to use a Google Voice phone number that we would have access to via wifi. If something happened to one of the dogs I’m sure we would do everything we could to get within reach of wifi in hopes that someone is trying to contact us. We also wanted an email address on the tags since it’s a pretty universal method of communication no matter what country we are in. Although some places we visit may not have internet, most of them will and this is really our best shot at being reached while cruising. We put our hailing port on there as well so if someone sees our boat, maybe they will only remember the San Diego part instead of the Mary Christine part. The more info the better. Both dogs are chipped and we’ll update that info too but we’re not sure that the places we’ll be visiting will have the scanning capabilities for the chips.

After a lot of reasearch we decided to order from Boomerang Pet Tags. Free shipping, no tax, international orders welcome, discount bulk pricing… but most important feature was the non-magnetic stainless steel they use with engraved lettering instead of stamped. We got two of the bone shaped SS tags for a little less than $10 each and they are totally worth it. They are made of the right material and they got all of our lettering on there!


A New Name

IMG_3159Rumor has it that it’s bad luck to change a boat name. This didn’t faze us though. Peter and I knew we wanted the name of our boat to mean something special to us. We didn’t want to call her a name that someone else had given her because then it would always feel like she wasn’t ours. Also, she isn’t just a boat to us, she is our HOME filled with love and joy. Her name needed to represent something safe, something protective, and above all something dear to our hearts.

Ever wonder why ships are always referred to as a SHE?

Naval History and Heritage Command says “It has always been customary to personify certain inanimate objects and attribute to them characteristics peculiar to living creatures. Thus, things without life are often spoken of as having a sex. Some objects are regarded as masculine. The sun, winter, and death are often personified in this way. Others are regarded as feminine, especially those things that are dear to us. The earth as mother Earth is regarded as the common maternal parent of all life. In languages that use gender for common nouns, boats, ships, and other vehicles almost invariably use a feminine form. Likewise, early seafarers spoke of their ships in the feminine gender for the close dependence they had on their ships for life and sustenance.”

There’s a lot of old sayings and poems out there about why a ship is called a She. I can’t seem to find the original sources, but this is my favorite:

“We always call a ship a ‘she’ and not without a reason. For she displays a well-shaped knee regardless of the season. She scorns the man whose heart is faint and doesn’t show him pity. And like a girl she needs the paint to keep her looking pretty. For love she’ll brace the ocean vast, be she a gig or cruiser. But if you fail to tie her fast you’re almost sure to lose her. On ships and dames we pin our hopes, we fondle them and dandle them. And every man must know his ropes or else he cannot handle them. Be firm with her and she’ll behave when skies are dark above you. And let her take a water wave – praise her, and she’ll love you. That’s why a ship must have a mate; she needs a good provider. A good strong arm to keep her straight, to comfort her and guide her. For such she’ll brace the roughest gales and angry seas that crowd her And in a brand new suit of sails no dame looks any prouder. The ship is like a dame in that she’s feminine and swanky; You’ll find the one that’s broad and fat is never mean and cranky. Yes ships are ladylike indeed, for take them all together the ones that show a lot of speed can’t stand the roughest weather.” – Anonymous

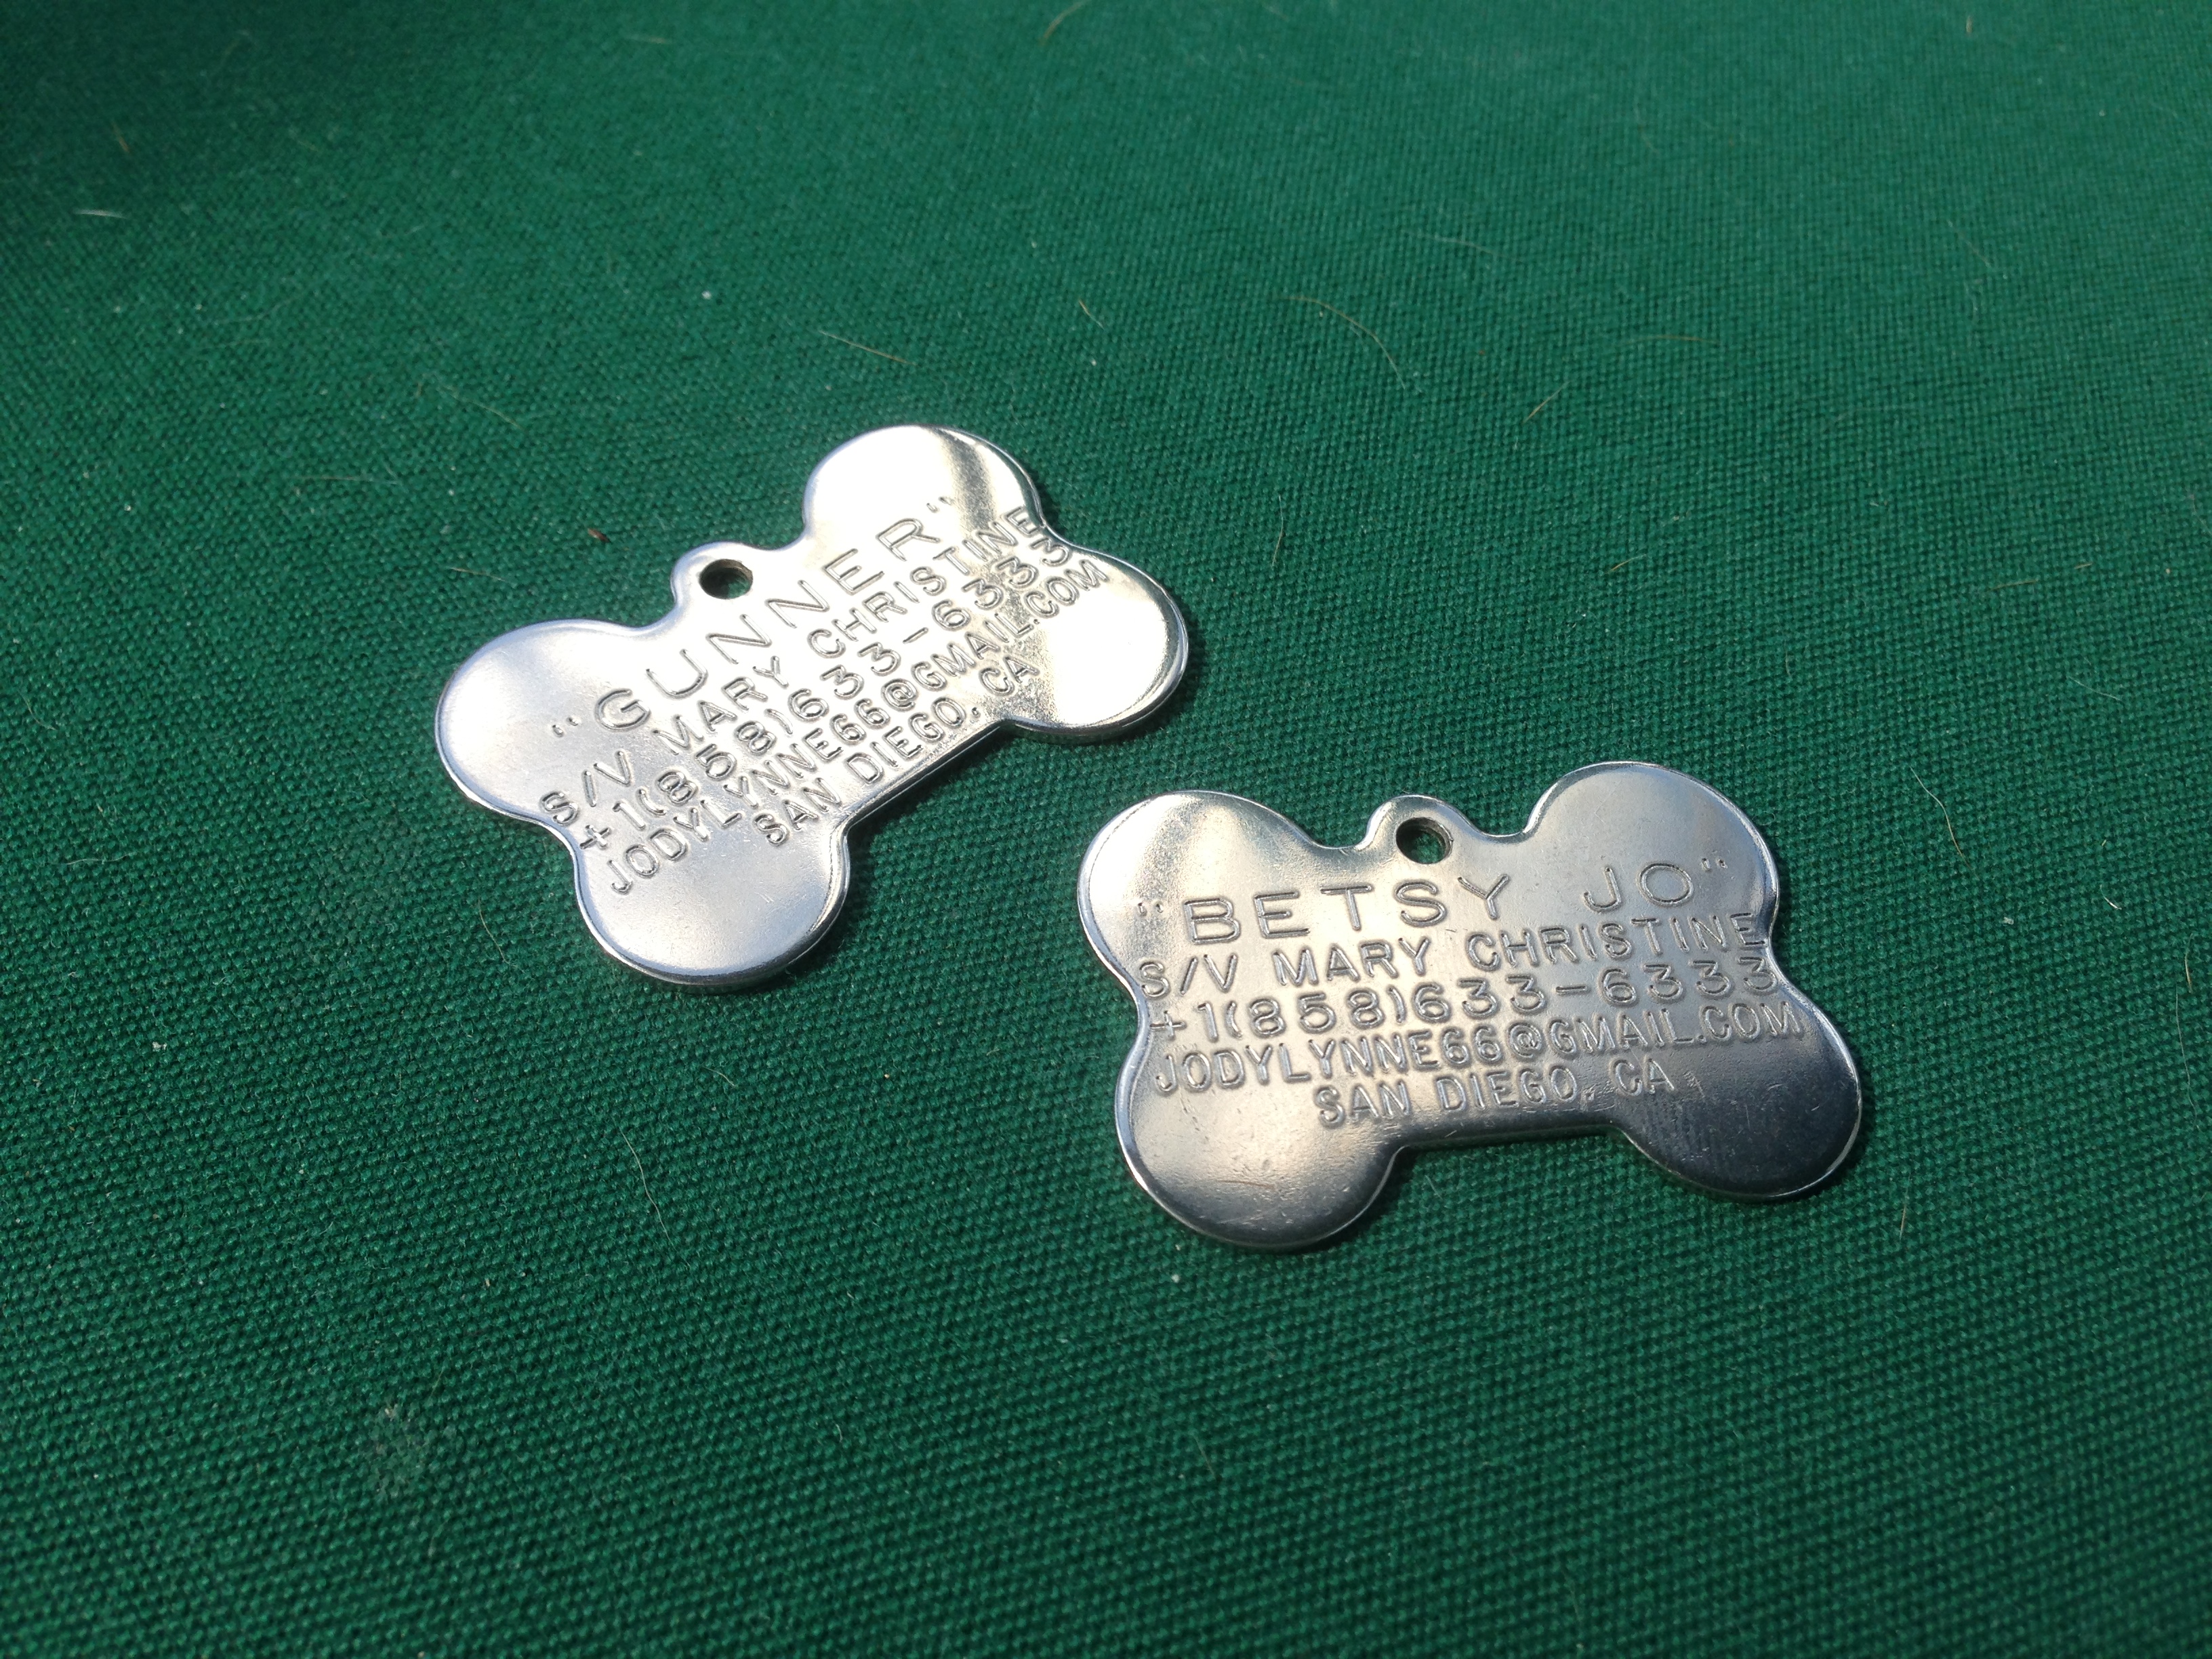
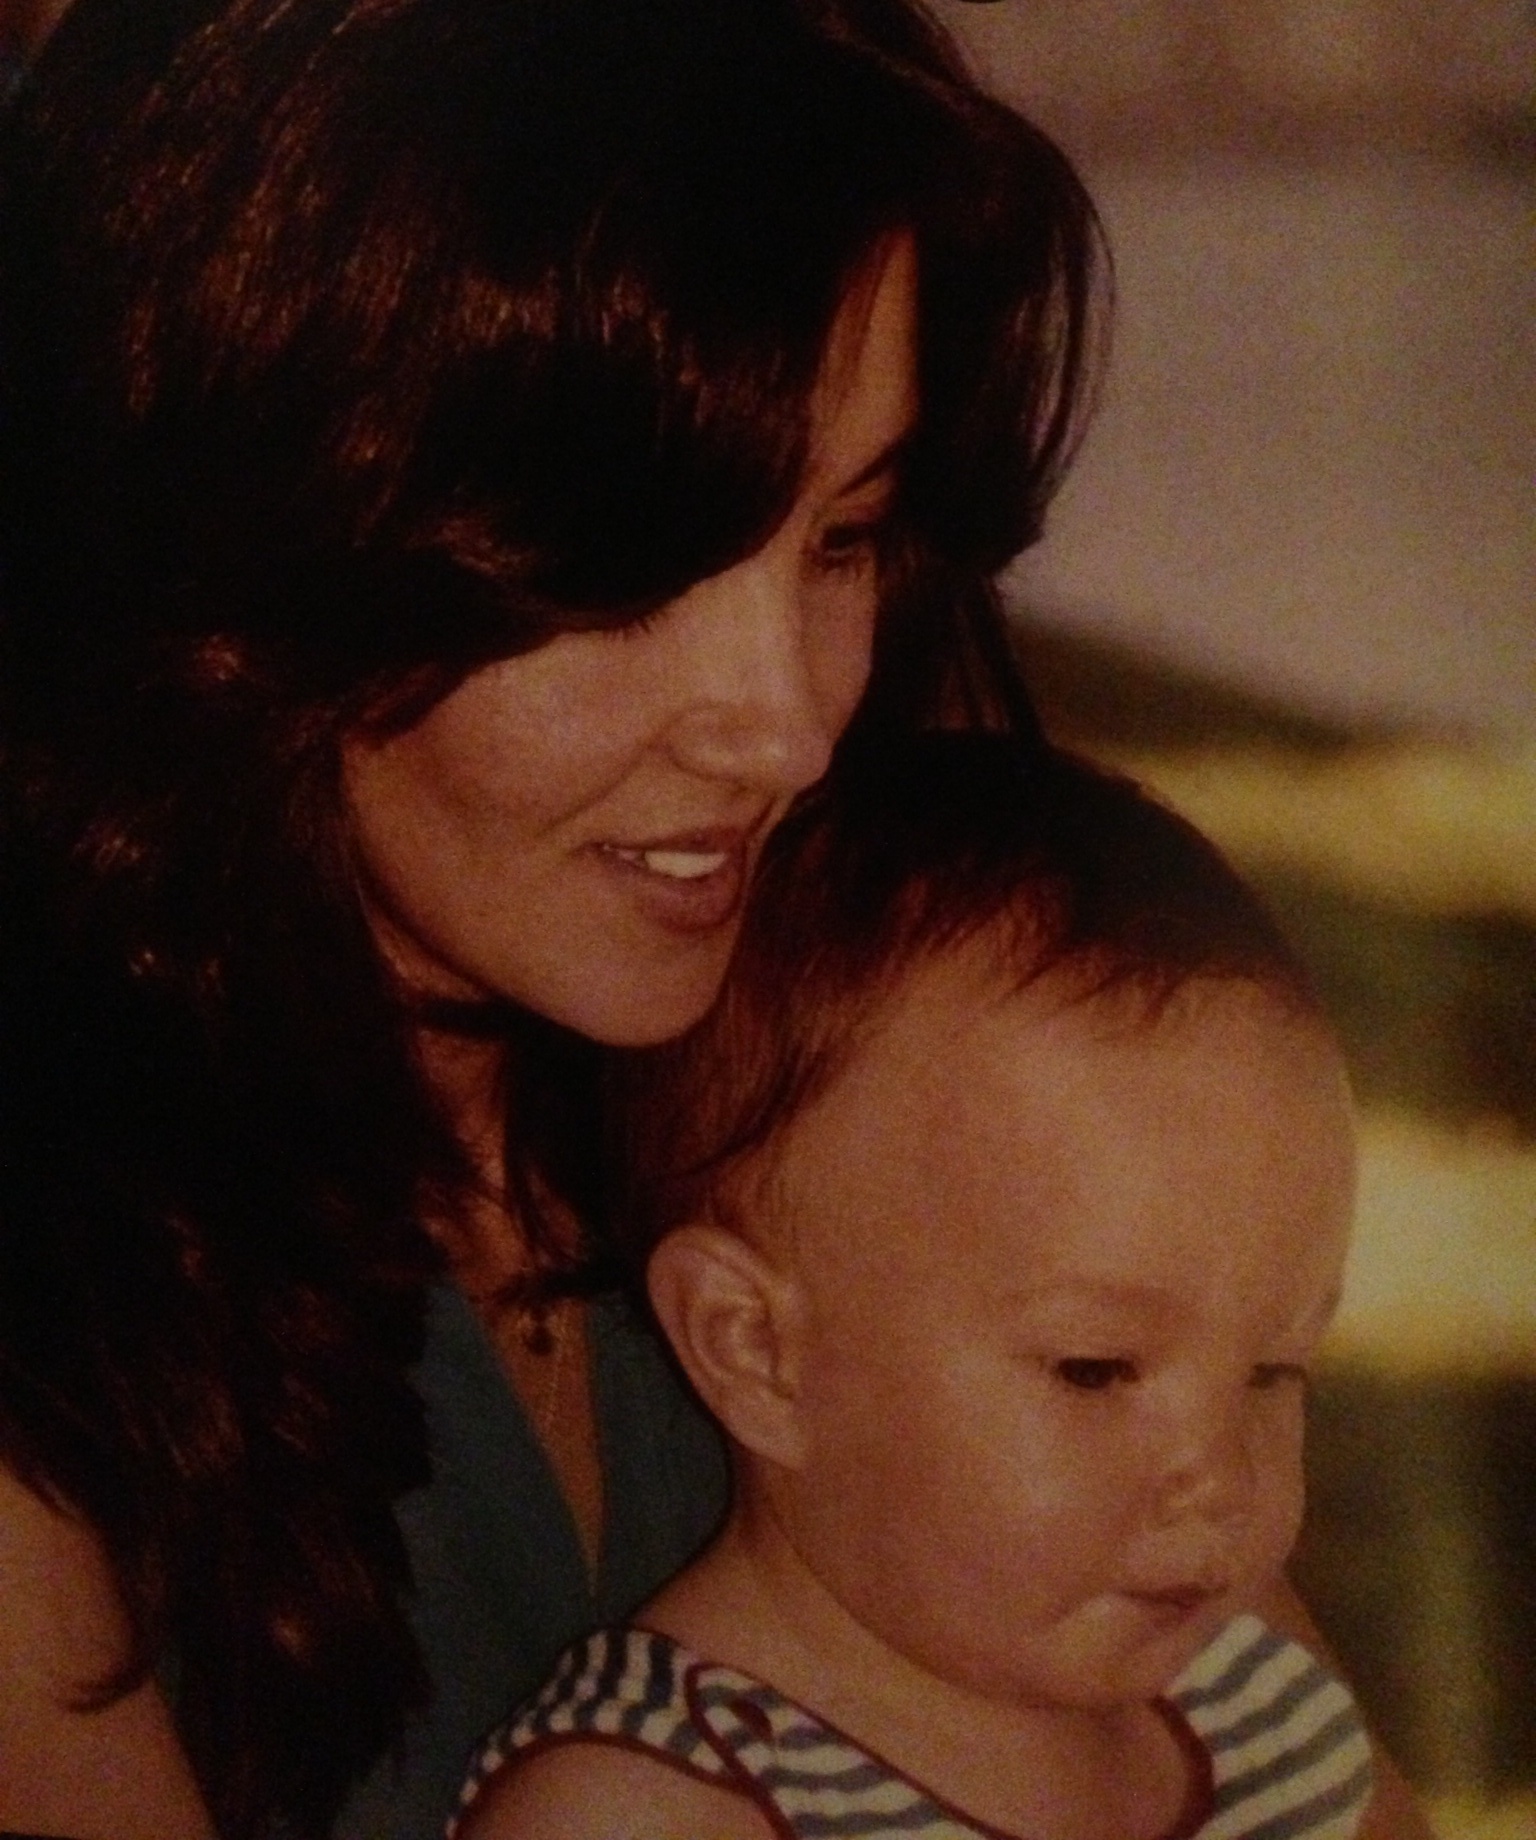
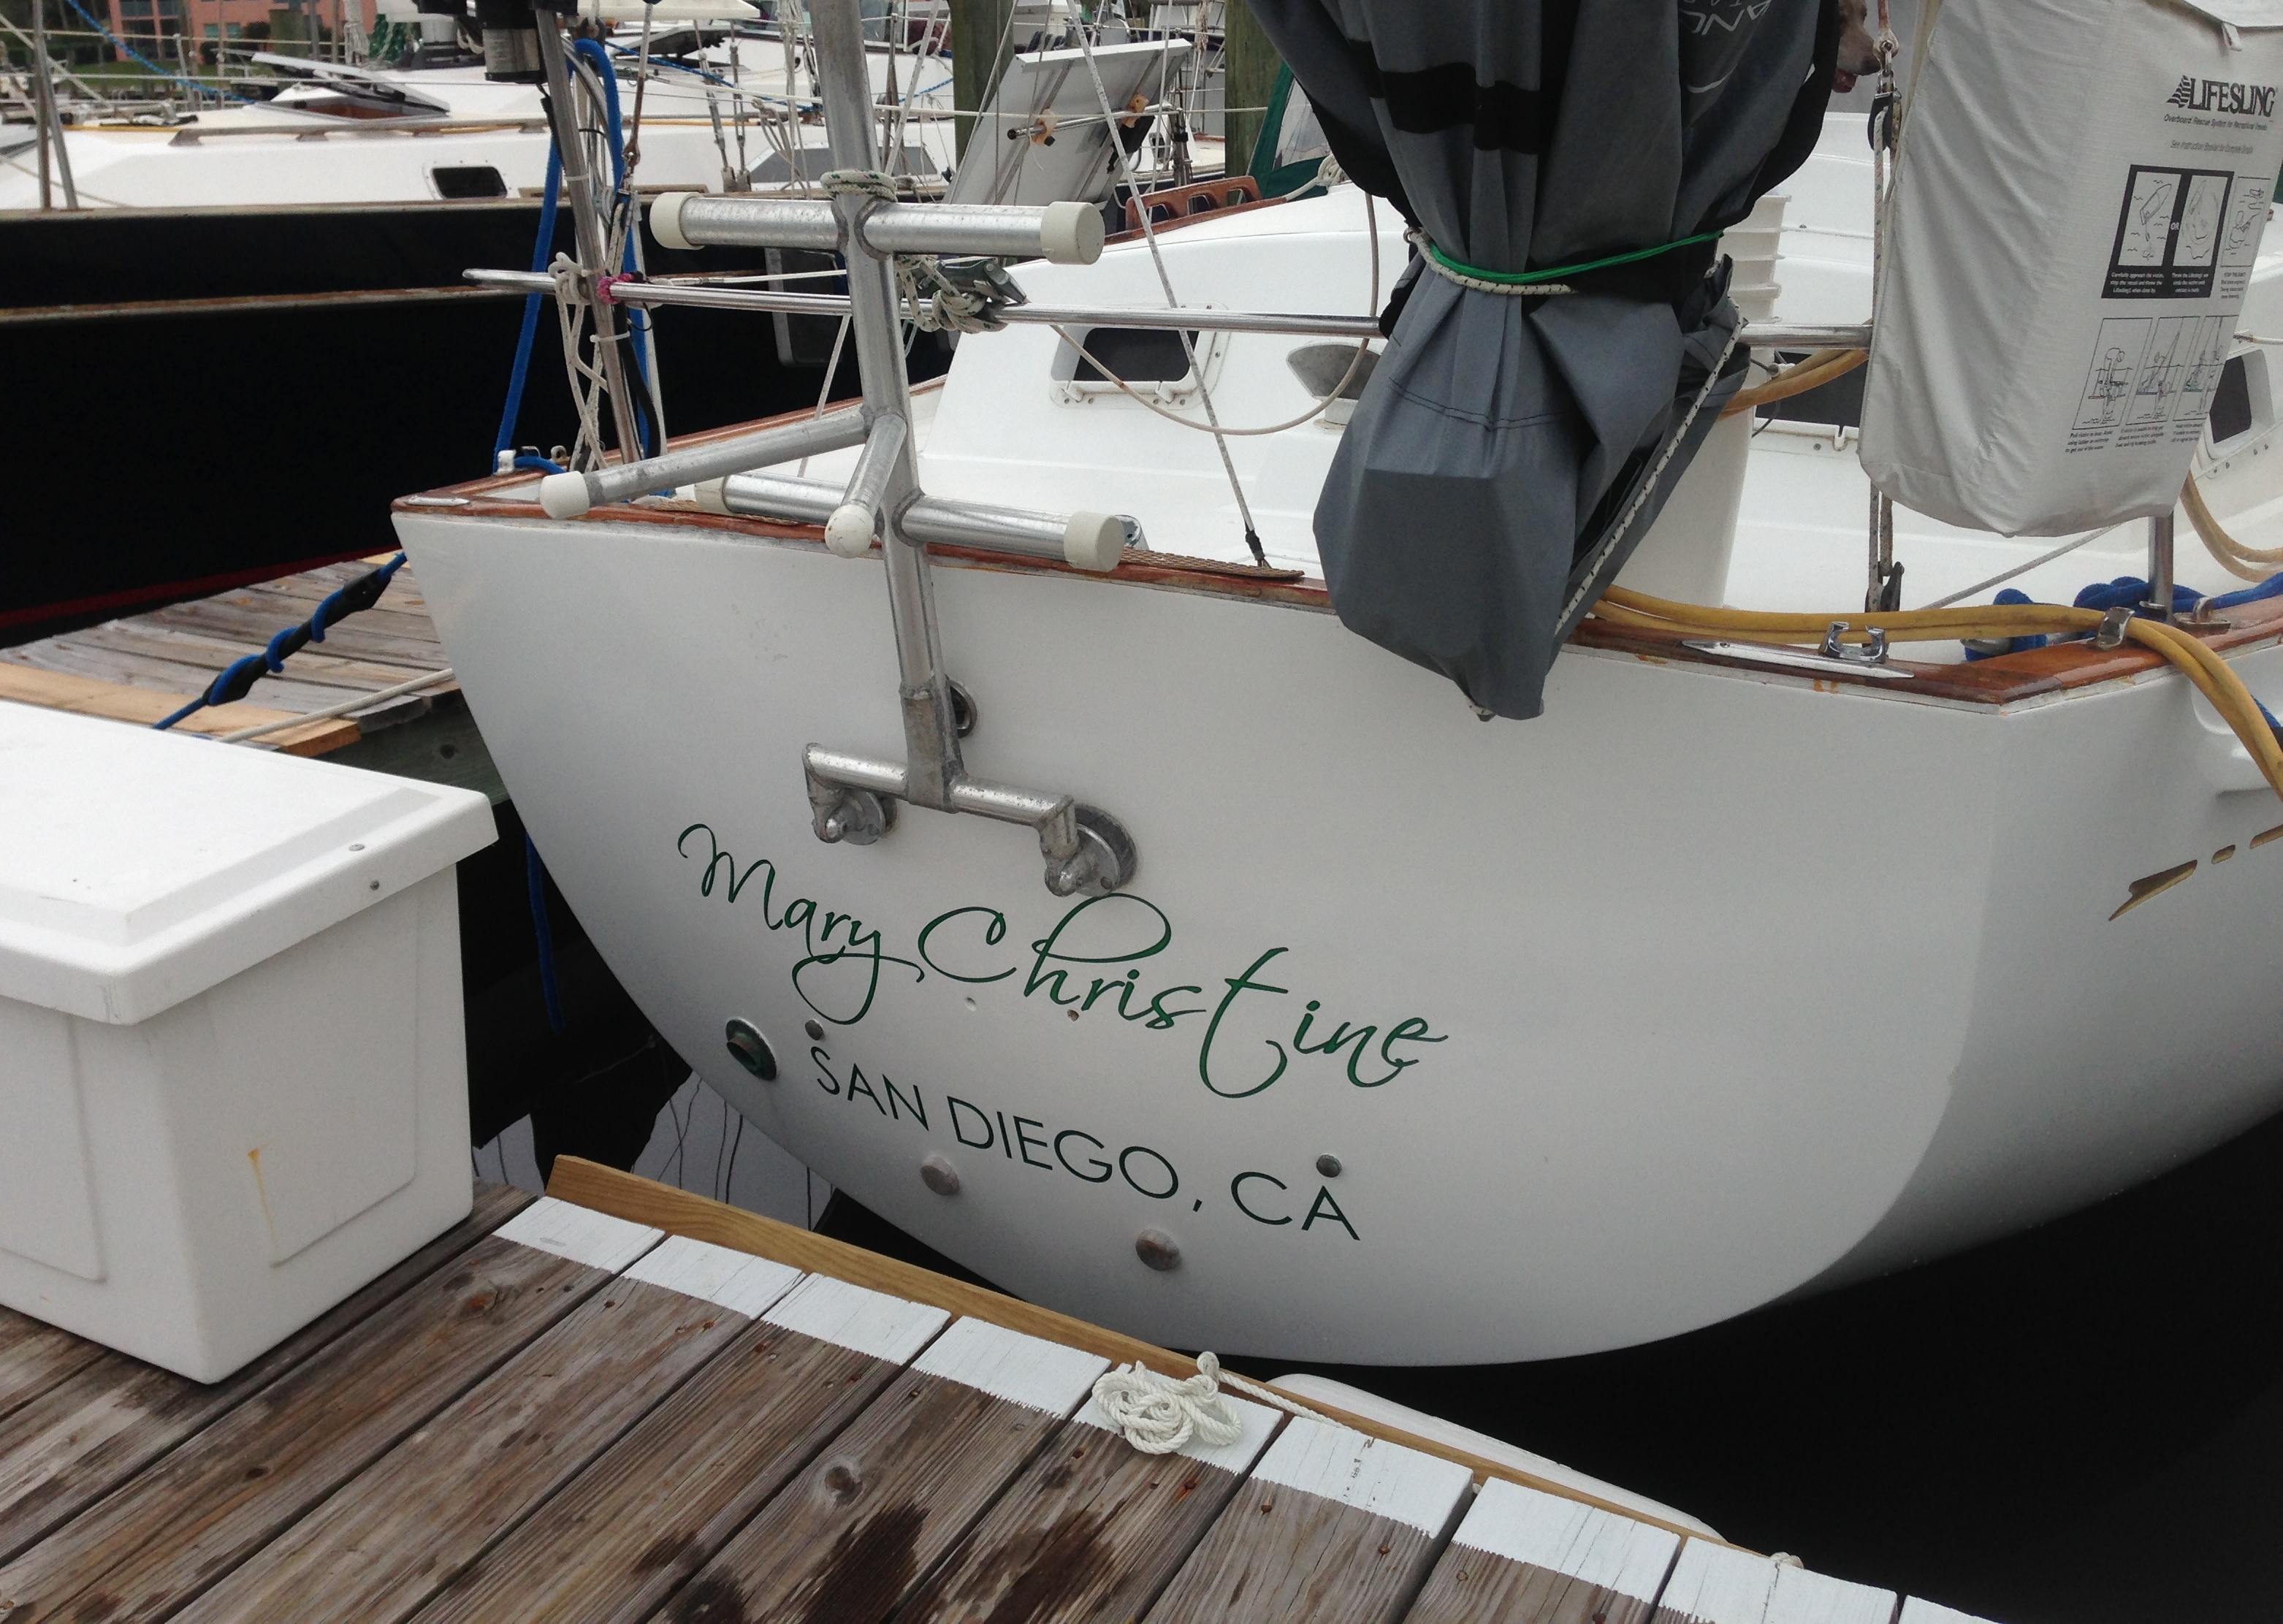
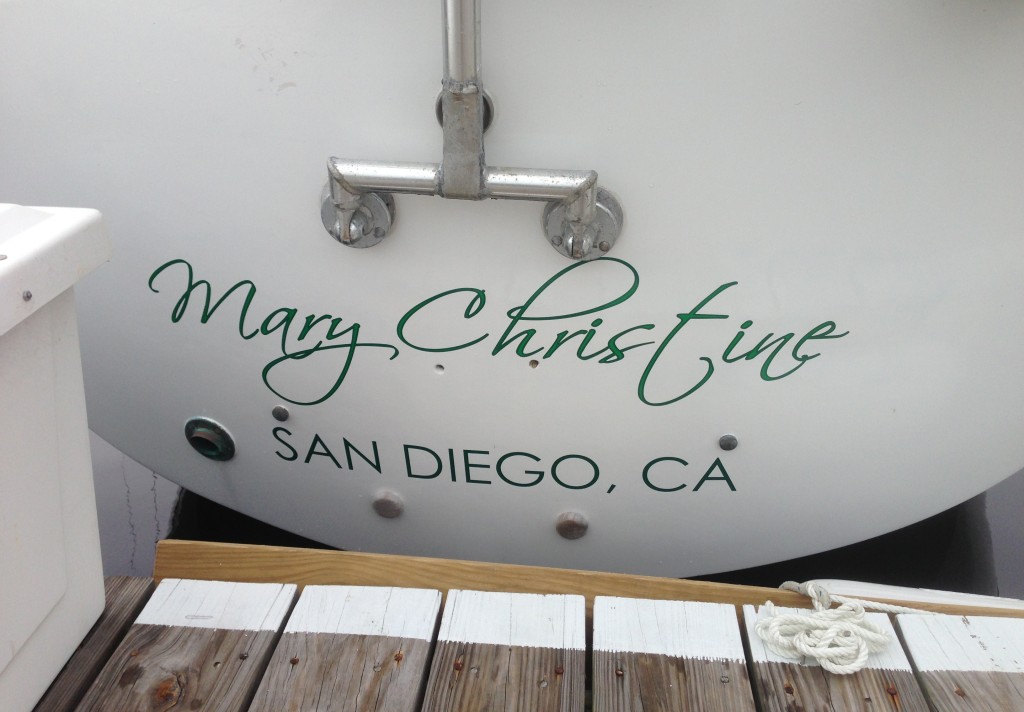
Without question, we named our boat “Mary Christine” in honor of Peter’s mother, Mary Christine Pieschel. She passed away in 2012 after a long battle with breast cancer. We know she will watch over us and keep us safe as we begin this amazing journey. Although she won’t be here in person, she will be with us in spirit each and every day. IMG_8715After we decided on the new name, we had to follow certain steps to get everything changed over properly. We made sure to put the new name on all of the closing documents when making the purchase, and of course listed Mary Christine as the new vessel name when filing the transfer of Certificate of Documentation with the National Vessel Documentation Center (US Coast Guard).

We had heard there were ways to avoid the bad luck associated with changing the name so with a little research we found some “good” superstitions to protect us.  We aren’t overly superstitious people but when it comes to a legend like this one, it’s better safe than sorry!! There were quite a few different versions out there on how to appease the sea and wind gods and purge the old name from the Ledger of the Deep but we decided on the Denaming and Renaming ceremonies described on caribbean-pirates.com. Click ‘here’ for the thorough instructions we followed. Just for good measure, we did all three of the denaming options listed.

This began with taking off EVERY item on the boat that had the old name written on it. I will say this… the previous owners did a STELLAR job of making sure they had everything labeled. I found “Hey Jude” written inside book covers, on the edges of all the charts they left us, on the cover of all the manuals, on the life jackets, and even on the propane tanks! Good thing we have already needed to refill the propane tanks and taken them out of the wet locker in the aft deck, or we wouldn’t have seen that the old name was written several times all over both tanks and underneath where they were bolted down. Permanent marker would suffice to make the existing permanent marker lettering illegible, but we tore off everything else we could physically remove.

The last piece that had to be removed was the vinyl lettering on the transom. Lucky for us, it was just vinyl and not painted on. I waited for high tide and brought my wireless Jambox out to the stern. Tunes definitely eased the monotony of this job. Its been a long time since I’ve laid out in the sun on a dock but this was the perfect opportunity for me to catch some rays so I changed into my bikini and grabbed a towel, a cold pop, my tunes, some sunscreen and a hat. I tried using a scraper but my nails did a better job. The outside of the lettering was more difficult since it was a single layer of vinyl. The center was thicker and peeled off much easier, especially on the larger letters. About a 1/3 of the way into it, I beckoned for help in fear of taking all day. With Peter’s help I was able to take some pictures and got every last bit peeled off.IMG_2819

IMG_2890
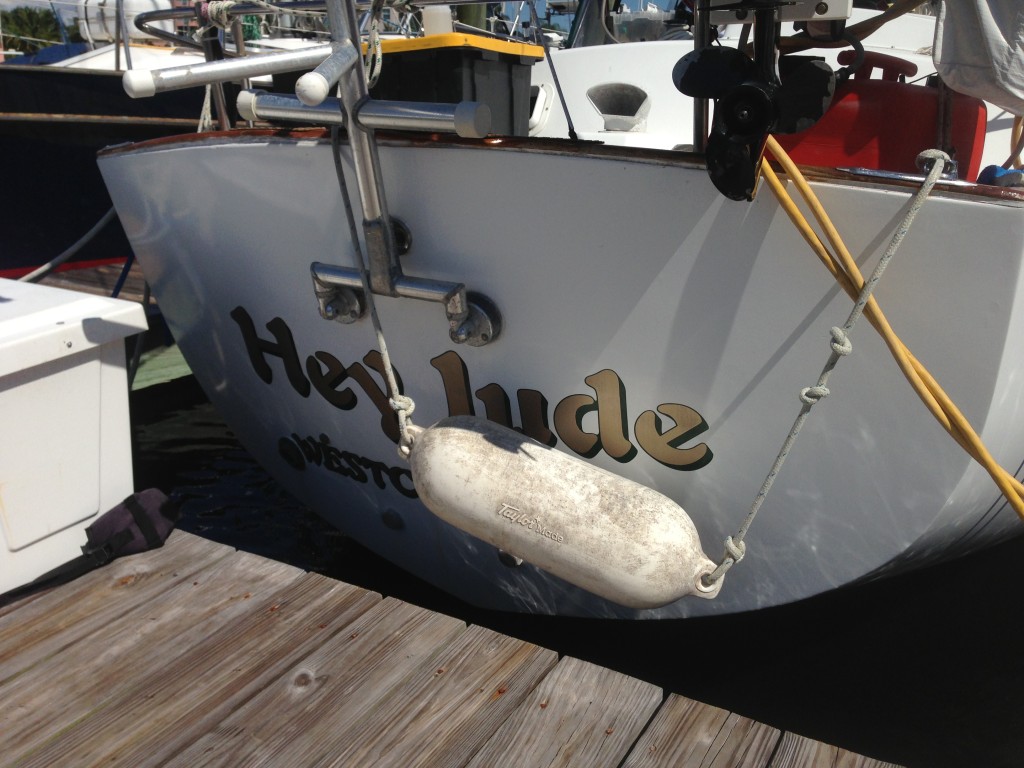
She looked so naked!!! The UV damage wasn’t bad at all since there was a relatively new paint job on the hull. We cleaned the transom up with a little soap and water, and some rubbing alcohol in a few spots that still had adhesive stuck on. The next step was to continue with the Denaming ceremony to purge the old hame from the Ledger of the Deep and to send the ashes of the old name out with the tide.

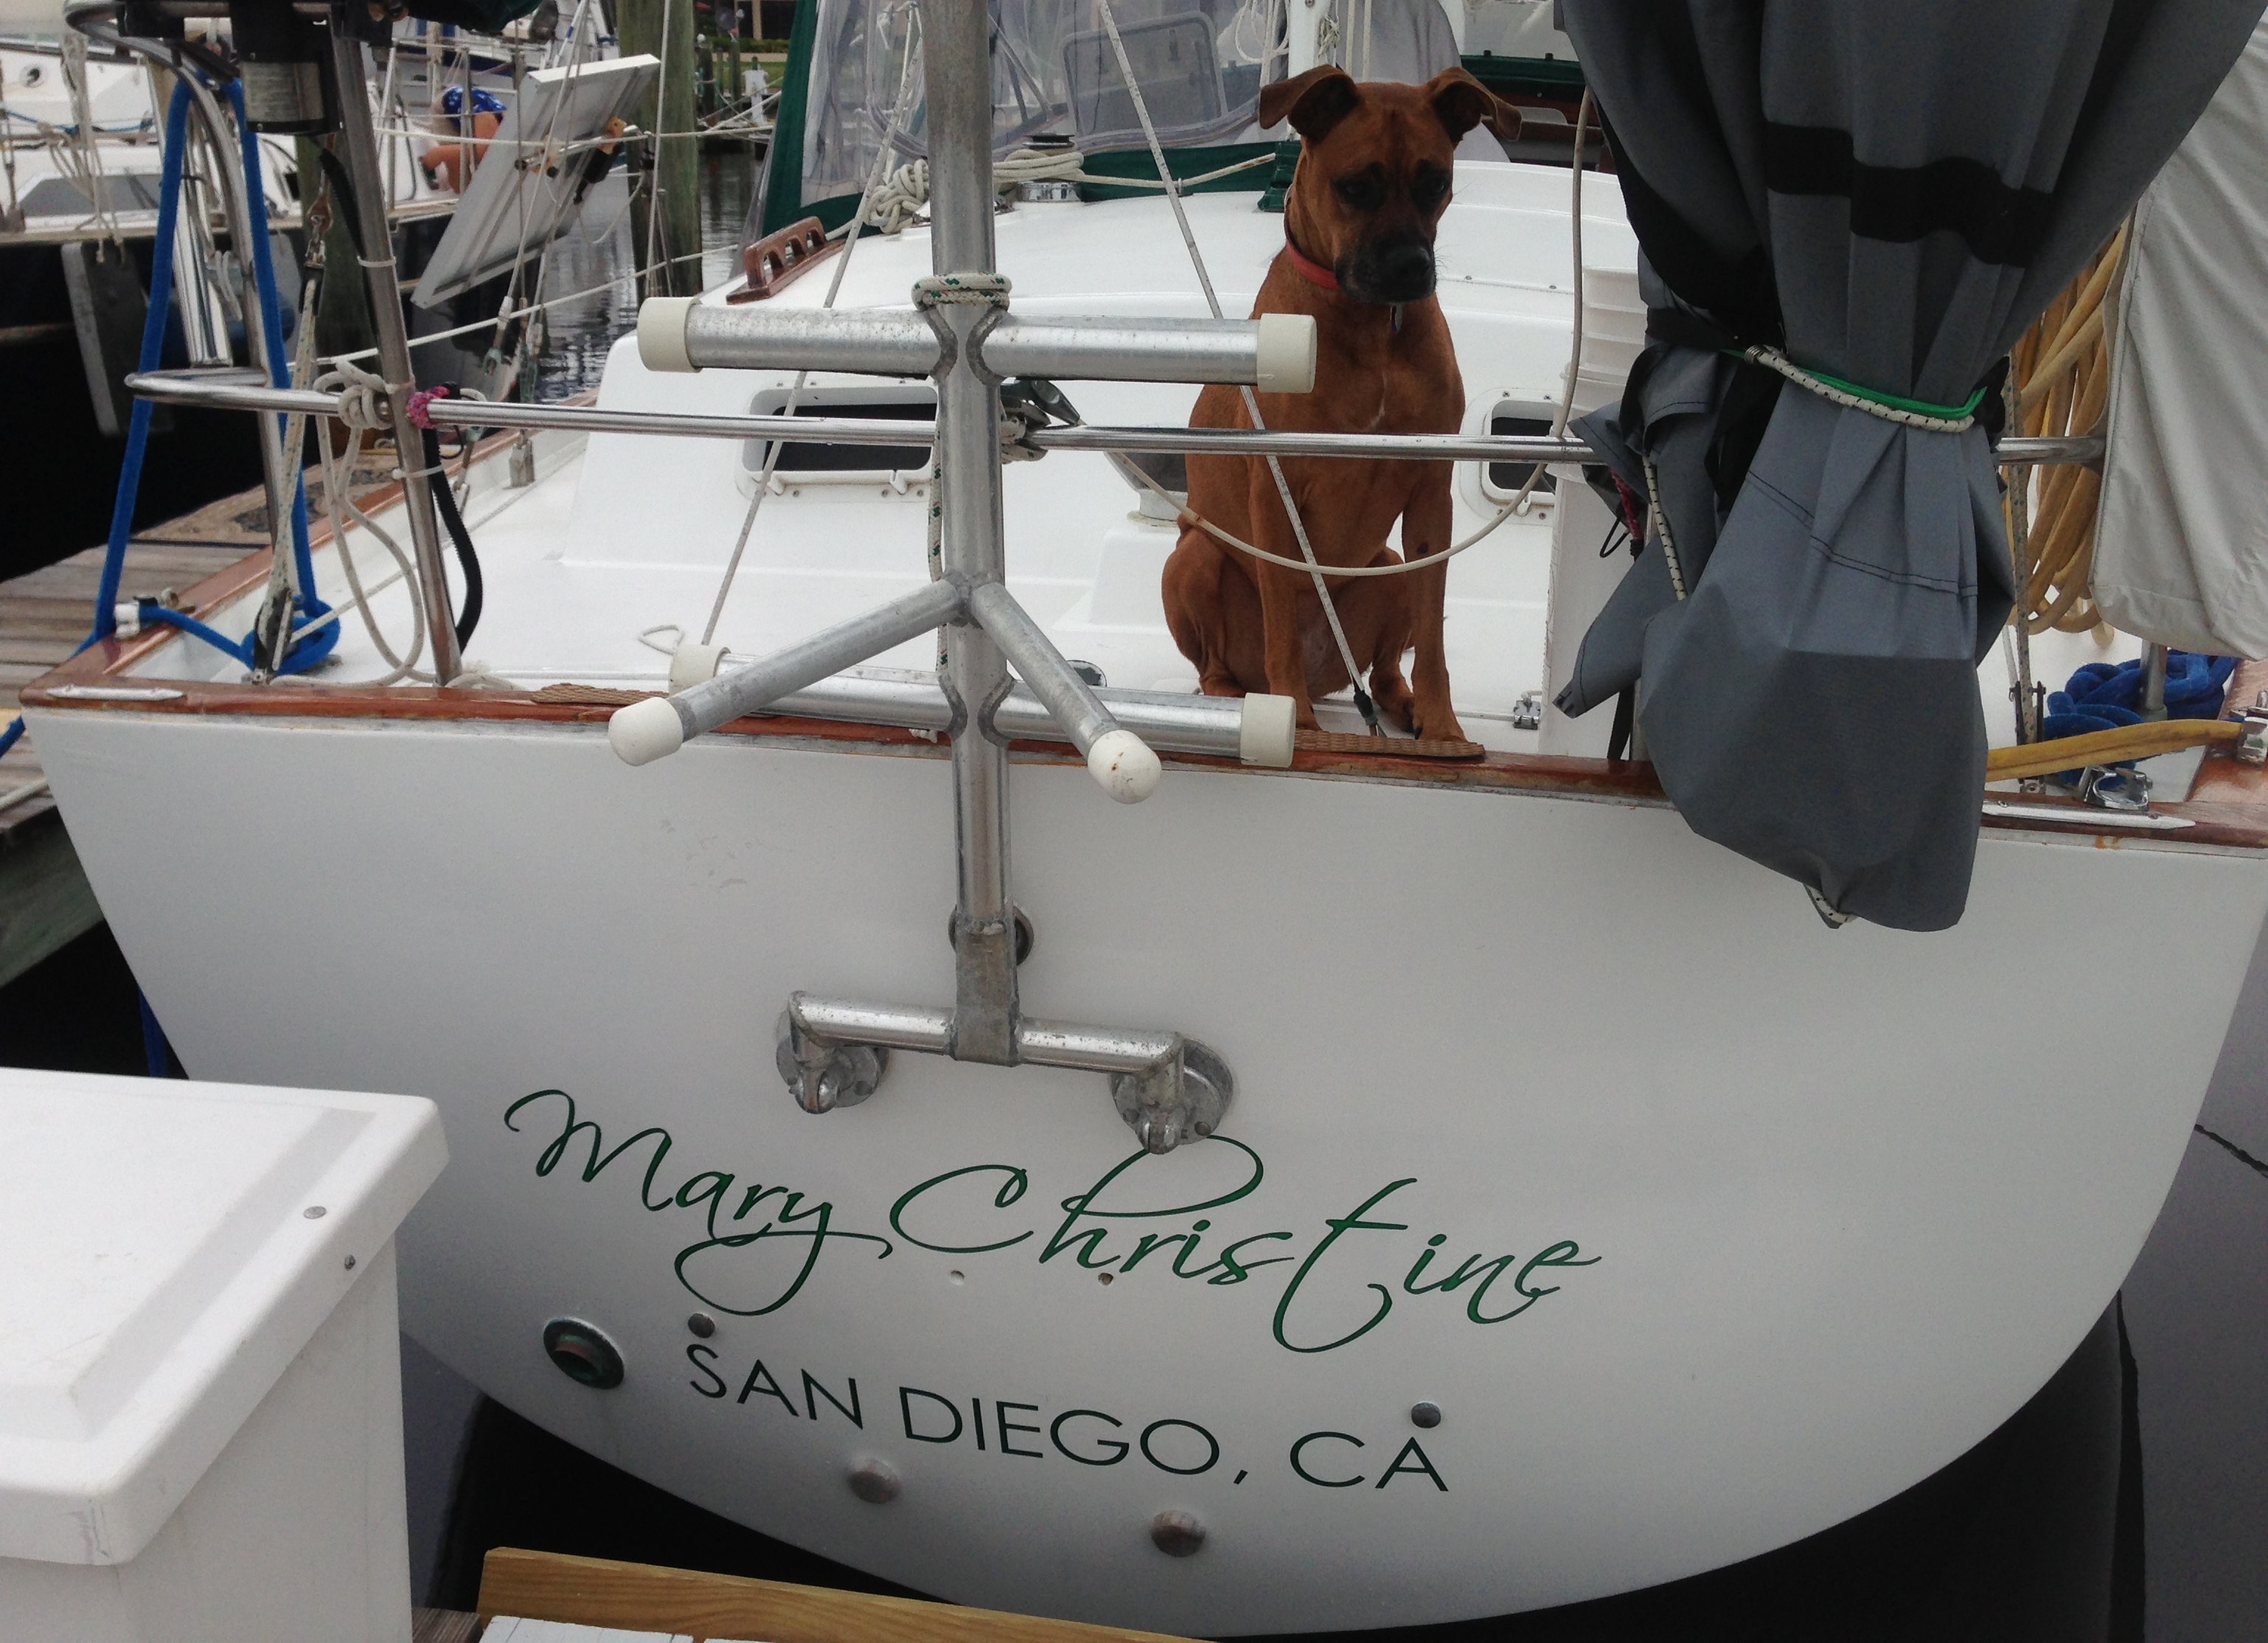
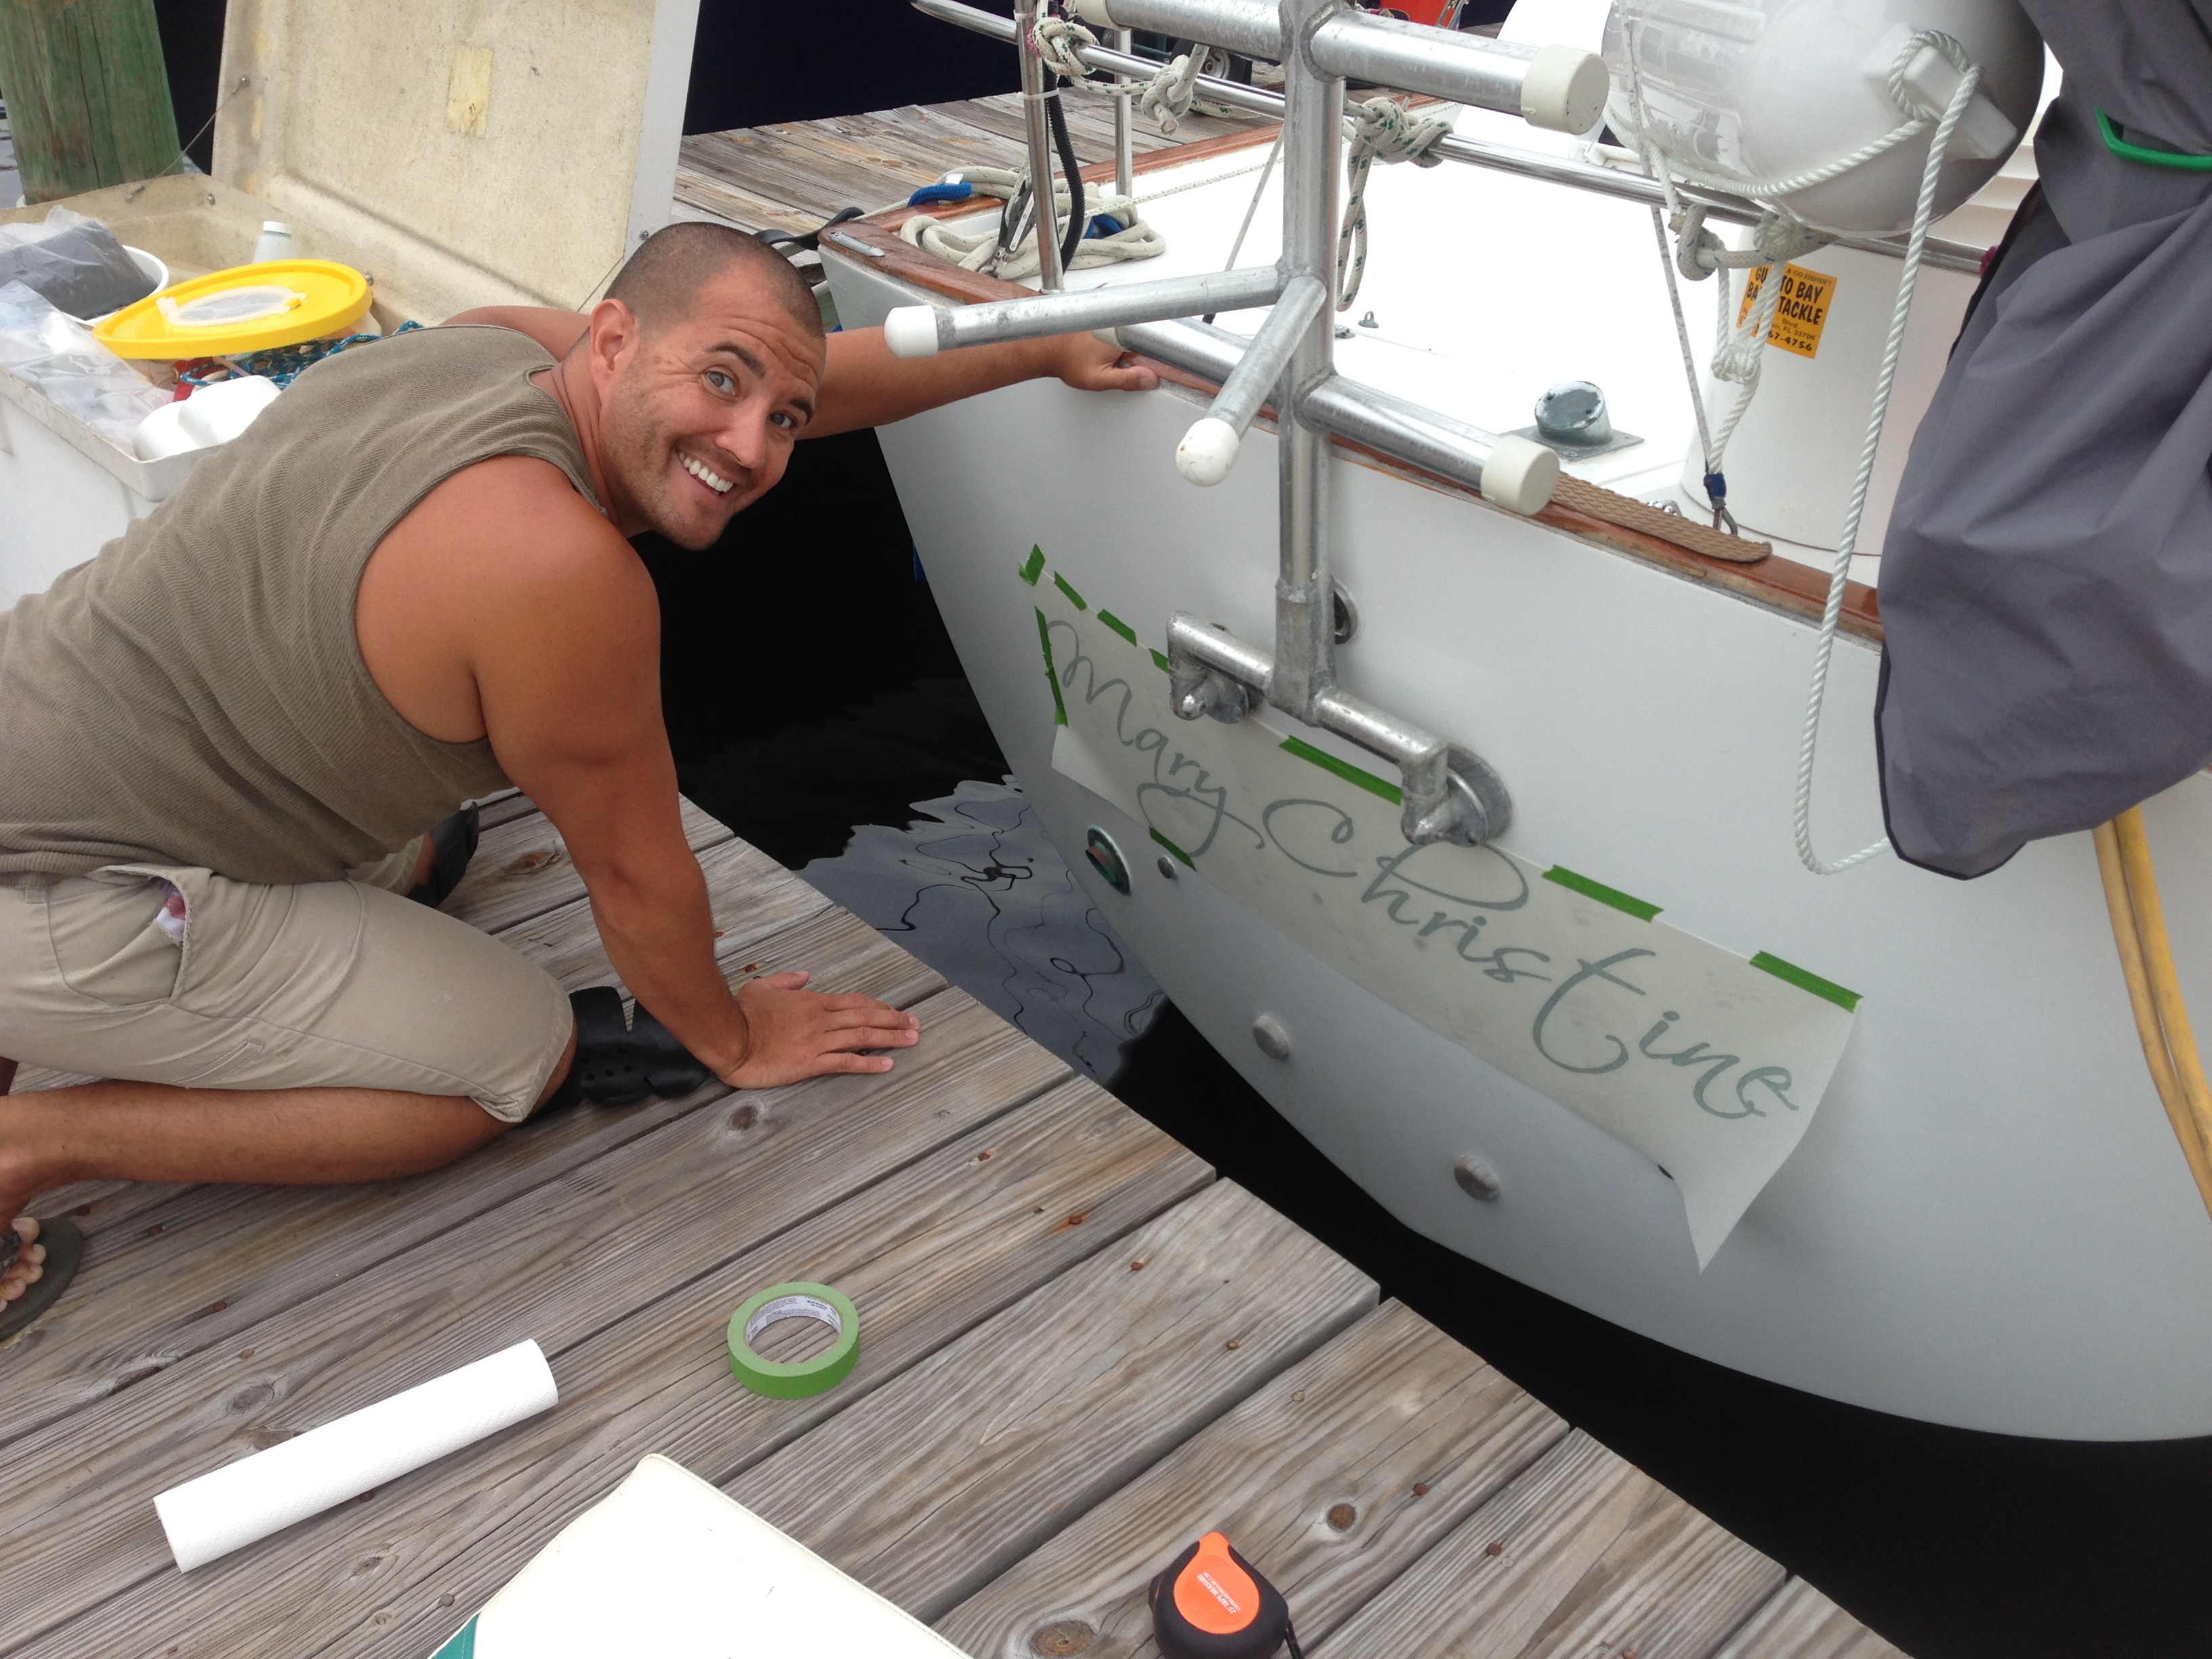
24 hours later we proceeded with the Renaming ceremony and poured champagne overboard to the gods of the wind and gods of the sea as described in the link above. We were finally ready to apply the new lettering and give the Mary Christine a beautiful new look. I had researched the best way to apply new lettering on boats and decided that vinyl would suit us just fine. We could have opted for painting the name on like many people do when you have a vintage boat. This would have cost us at least a few hundred dollars though and doesn’t always last as long. Knowing we don’t plan on returning to the U.S. very soon we opted to go with vinyl which would be easier to replace if it ever got damaged. There are SO MANY places, both local and online to buy vinyl lettering and all seem to have different advice for the application. Some warn of dry applications being too hard for amateurs like us and instead tried to sell us on the wet application method which you can slide around before squeegying out the liquid to set the placement. More important for us was to find the “right” look. Most of the online sites didn’t have much for font or color options and we were getting discouraged. I spent several nights up late on the computer. 

Finally I stumbled upon DoItYourselfLettering.com and I can’t even describe how awesome this site is!!! They do a lot more than just boat lettering, there are vinyl lettering options for lots of different applications. The online interface for creating your design is top-notch and by far better than all the other sites I looked at. Even if you don’t need any lettering done I recommend checking out their site just to play around with the design tools incase you can think of somewhere fun to put the letters later :) Just like the website says, Brad is the owner and he personally answered my call when I had a question about my order. Just by caller ID he knew who I was, what I ordered and all my shipping info. They guarantee their product so if you have any trouble installing it yourself they will send you a replacement for FREE!! It really was pretty easy to install though, just a little patience to make sure its level and centered, and you end up with a DIY project that looks very professional. The customer service was outstanding and the pricing is unbeatable, even with adding a border color, selecting “ready to install” and upgrading to a Premium 3M Cast Vinyl material for an additional $15. The total for both the name and the hailing port was less than $80. If you are putting the lettering on a boat, we highly recommend using the premium material since it will hold up much better in the sun and salt. We selected Scriptina for the font on the name and Century Gothic for the hailing port. If you have any questions about ordering lettering for your boat or other toys please contact us!! I love to spread the word and support great services and products when I find them so others can share the same great experience that I have had. IMG_2893

IMG_3143

IMG_3150

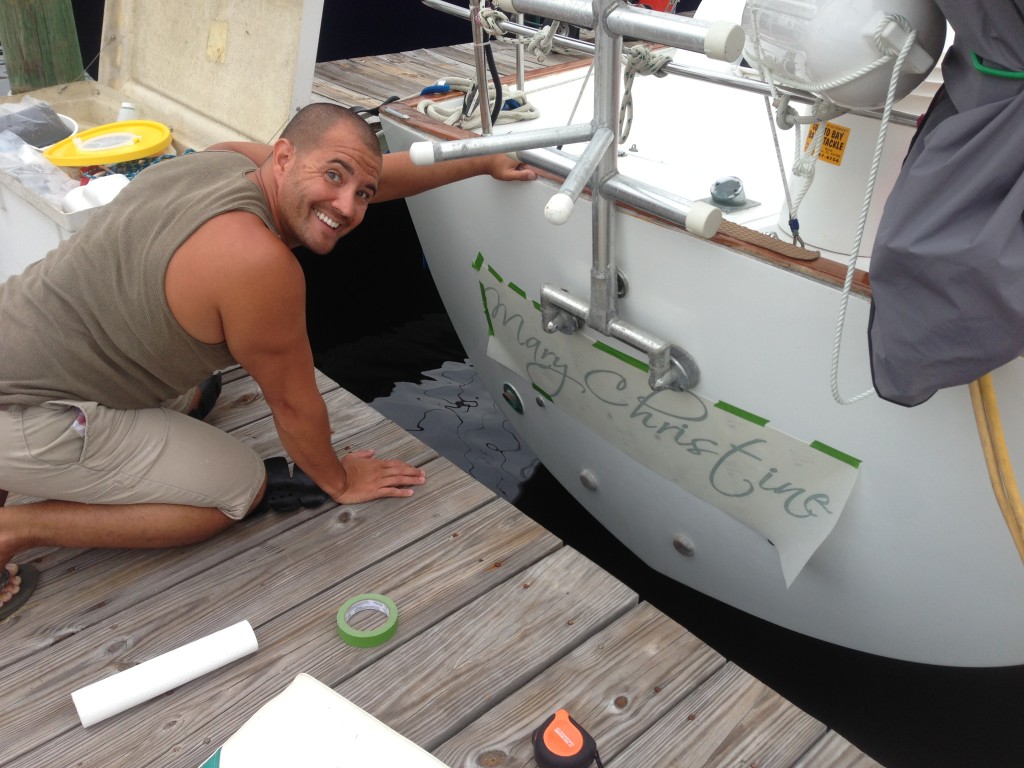
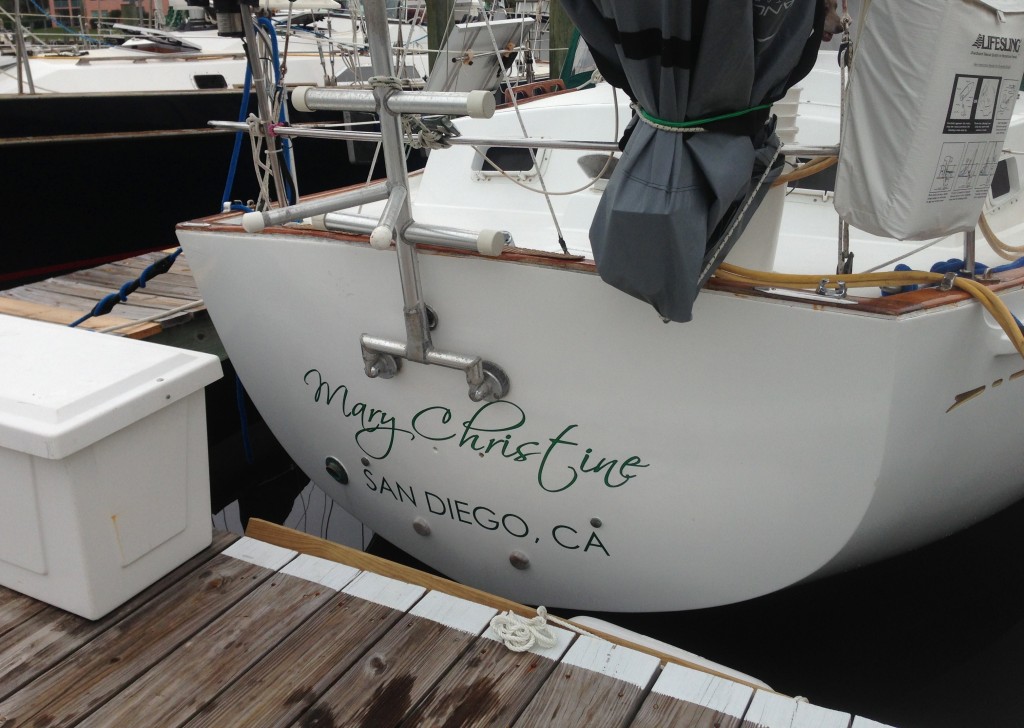
She is really starting to look as beautiful as we could have dreamed!! It’s all coming together now :)

Juice It Up!

IMG_3285Our batteries were about three years old and started to get noticeably HOT. Two of the 4D batteries reside underneath the nav station seat and my toosh was getting too toasty!! The third is in the engine room. When we first arrived at the boat in September the water level inside the battery cells was very low. About 16oz of distilled water per cell were needed to bring them up to the proper level, but even after that they were still bubbling over, seeping out of the vents on the top of the batteries. While it’s not straight battery acid that’s coming out, it’s still very corrosive and dangerous. You can see the spillage in the picture above (disregard the terrible quality!)

This was a high priority boat project and we couldn’t put it off any longer.  We would have liked to put in 8D batteries to yield more amperage for a longer duration but the housing just wasn’t big enough and it’s not critical enough to rebuild the existing box or expand elsewhere. Our research discouraged us from the higher priced AGM batteries or gel batteries. The increased life just wasn’t enough justification for the higher price, and we’ve also heard from many salty dogs that they don’t always have a longer life either. We don’t mind the additional maintenance of refilling the distilled water every couple of months, especially if it means saving a few hundred dollars on these bad boys.  We went with some Deka Lead Acid batteries for $220 each. Plus, we were able to get them from the yard right here at our Marina.  The guys even said they would come pick up the old batteries at our slip. What a deal! IMG_3291The first step was to shut off all the power. No big deal, it’s just in the high 80’s outside and muggy as all hell. No power means no air conditioning…

Peter put on his safety glasses and gloves, then used a little T-9 to loosen up the terminals and the first one was ready to come out. A whopping 80lbs of battery and seeping lead acid had to be lifted out of that hole without dripping anywhere. Peter and I got it onto a black trash bag, but there was NO WAY I could help him lift it up the vertical 5′ ladder and through our companionway into the cockpit or over the lifelines onto the dock. Our super nice neighbor Karl donated some sweat equity and came to the rescue. IMG_3296It’s not a real boat project unless you get sidetracked and start a new one before finishing the first one, right?? Don’t forget, we still have NO POWER and NO A/C since we are only 1/3 done with the batteries. In order for the wood platform to screw back in properly over the top of the new battery, we got the chance to use our handy-dandy vice that was left by the previous owner on the back side of our engine room door. There was a small piece of wood that was beginning to split so we used some liquid nails and a screw to fix’er back up. IMG_3299

IMG_3305

IMG_3308

IMG_3318The clock ticks on and we finally get the board back in place. My red toolbox fits perfectly where the previous owner had his toolbox. He laid non-skid strips down with screwed on wood blocking to hold the toolbox in place while underway. There’s also a strap that goes over the top for double measure. The snap that holds the strap also busted off but that’s a little less critical so we’ll add that one to the “list” for another day. On to finishing the batteries…

The last two sit more than snuggly inside the nav station seat and there is a grip of wires in the way making it extra difficult to remove the old leaking batteries. We are running out of daylight. It’s not getting any cooler and we are both sweating all over the place. I am able to lift the first one out of the box with Peter, but not the second one. Karl comes back over to help us out again. Two men are stronger than one! Now we just have to get them hooked back up properly and quickly. The headlamp came out long ago. Good thing we have little batteries to help us shine light on the big ones!!

Before lifting the new batteries in, we need to clean out the box with baking soda and water to neutralize all the spillage. We’re not sure how long it had been like this, but there was an awful lot of corrosion and that’s never a good thing on a boat. Luckily the structural integrity of the box wasn’t affected and we won’t need to rebuild anything… yet. Now totally dark, and still sweating, we tried to air out the fumes from the neutralization as best we could. We were determined to get this finished in one night so I mustered up all the strength and gumby-like leverage I had to help Peter drop them into place one at a time. After all the wires were put back together the right way and the terminals got a fresh coating of T-9, it was time to see if we had juice. Whew!! Everything seemed to be okay.IMG_3324

IMG_3325We were both so tired and on the verge of dehydration that when we plugged the shore power back in to get some air conditioning, we plugged them in the opposite locations. The fault warning was going off and it took us a few minutes to realize it had nothing to do with the connections for the new batteries, but that it could be the shore power cables. Peter went out to switch them and the beeping stopped. Finally! Light and cool air!!! The poor puppies had been waiting so patiently for dinner and potty time. We got the pups outside first, then back for their dinner and then we were finally able to head to the showers to get cleaned up.

The work wasn’t done yet… we still had to neutralize the acid that had leaked out and down onto the carpet. We sprinkled some more baking soda and let it do its work. There was more reaction than we were expecting, but its all cleaned up now. We’ll be tossing that piece of carpet for sure and replacing it very soon. Another thing to add to the list!

All in all, our first major boat project took longer than we anticipated but it was successful in the end. Next time we replace the batteries, it will hopefully take us half the time and we will be sure to start the process on a cool day and early in the morning :)

New Vehicle

20131111-150752.jpg

Our new secondary means of transportation is finally ready to rock n roll!!

We shopped for a few weeks for a dinghy and motor on Craigslist. I just LOVE Craigslist!! We have sold a combined $6000 worth of stuff back in San Diego not including motorcycles and vehicles. When looking for something specific, it’s the first place we look, and usually someone has just what we need!

When we’re out cruising on a sailboat we need something reliable to get to and from shore. When you live on a boat, a dinghy becomes your “car”. We didn’t need anything real fancy or new, but we did want it to be reliable. As with everything, that’s hard to come by for a reasonable price, let alone finding a steal of a deal.

A couple of important factors were considered: length, material, matched rating for dinghy vs motor, weight, floor type and functionality.

Peter wanted a dink that could hold four people (when we have visitors), two dogs, fishing gear, and/or provisions from a local market. This of course means we need a dinghy that is rated for an engine capable of hauling a load like that.

We wanted to try the aluminum floor since we will have LOTS of fish hooks, plus dogs aboard and need something that will be the least likely to be damaged from hooks or 32 sharp protruding puppy toenails.

PVC material is easier to come by, but Hypalon material is what everyone buys if you are going to be in the tropics. The sun doesn’t warp it or melt the glue as fast and it holds up to the salt better too. This of course would mean spending more money.

We originally wanted a 4-stroke motor but the lighter 2-strokes started looking better and better when we considered having to lift it off to lock it up on our stern every night in the islands. There are indeed thieves who will come swipe off anything that’s easy to grab, especially outboard motors.

We settled on an Advanced Inflatable PVC 12′ (6 person) dinghy with a
Mercury 15hp 2-stroke outboard motor. Anything less than 10′ typically isn’t rated for a 15hp motor and we for sure wanted the extra power of a 15hp. The motor is almost 15 years old but the previous owner kept it meticulously maintained, it looked brand new inside! It’s not too noisy and it’s less than 75lbs which means even I can lift it up or down to Peter when we take it on or off.

12′ of dinghy isn’t exactly ideal for us since we don’t have davits off the stern, and that means it gets hauled onto the bow with a halyard. Once we get it up there, our huge foredeck is reduced to zilch :( Less room for the puppies when they are on guard and less room for us to move about. The good news is that it’s a roll-up with three chambers so we can let some air out of the bow and partially roll it up when we are underway. The aluminum floor is awesome, super sturdy and the inflatable keel seems to help keep us very steady. Did I mention its a nice pretty white color?

The real reason we closed the deal is because of the price. We basically paid for the motor and got the inflatable for free. Turns out the dinghy was defective and was made with a bad batch of glue. It was only put in the water three times before we purchased it and it looked okay, but within a couple days of having it in the marina all the handles, rub rail and transom came off. We kind of had a feeling it would be easier to exchange it than repair the rub rail that had already started coming off the day we bought it, but this just confirmed it. Under warranty, we just had to drive to Ft Lauderdale to get an even newer one. Lucky for us, we were going there anyway to go to the Boat Show!! Now we have a brand new 2013 model, right out of the box and still under warranty, which retails for $1200. Just the motor is worth what we paid for the whole package so we’re pretty stoked. It’s not Hypalon, but we figure we can just beat this one up for the first year or so until we need to buy a new one, then upgrade to a more durable material. The tropics will surely do a number on it but we don’t care so much since it was basically free :)

New toys are always fun and this one seems to be treating us pretty well. The dogs haven’t been for a ride yet but we hope they will like it too!!

20131111-193030.jpg